 Hitori-Gotten Log
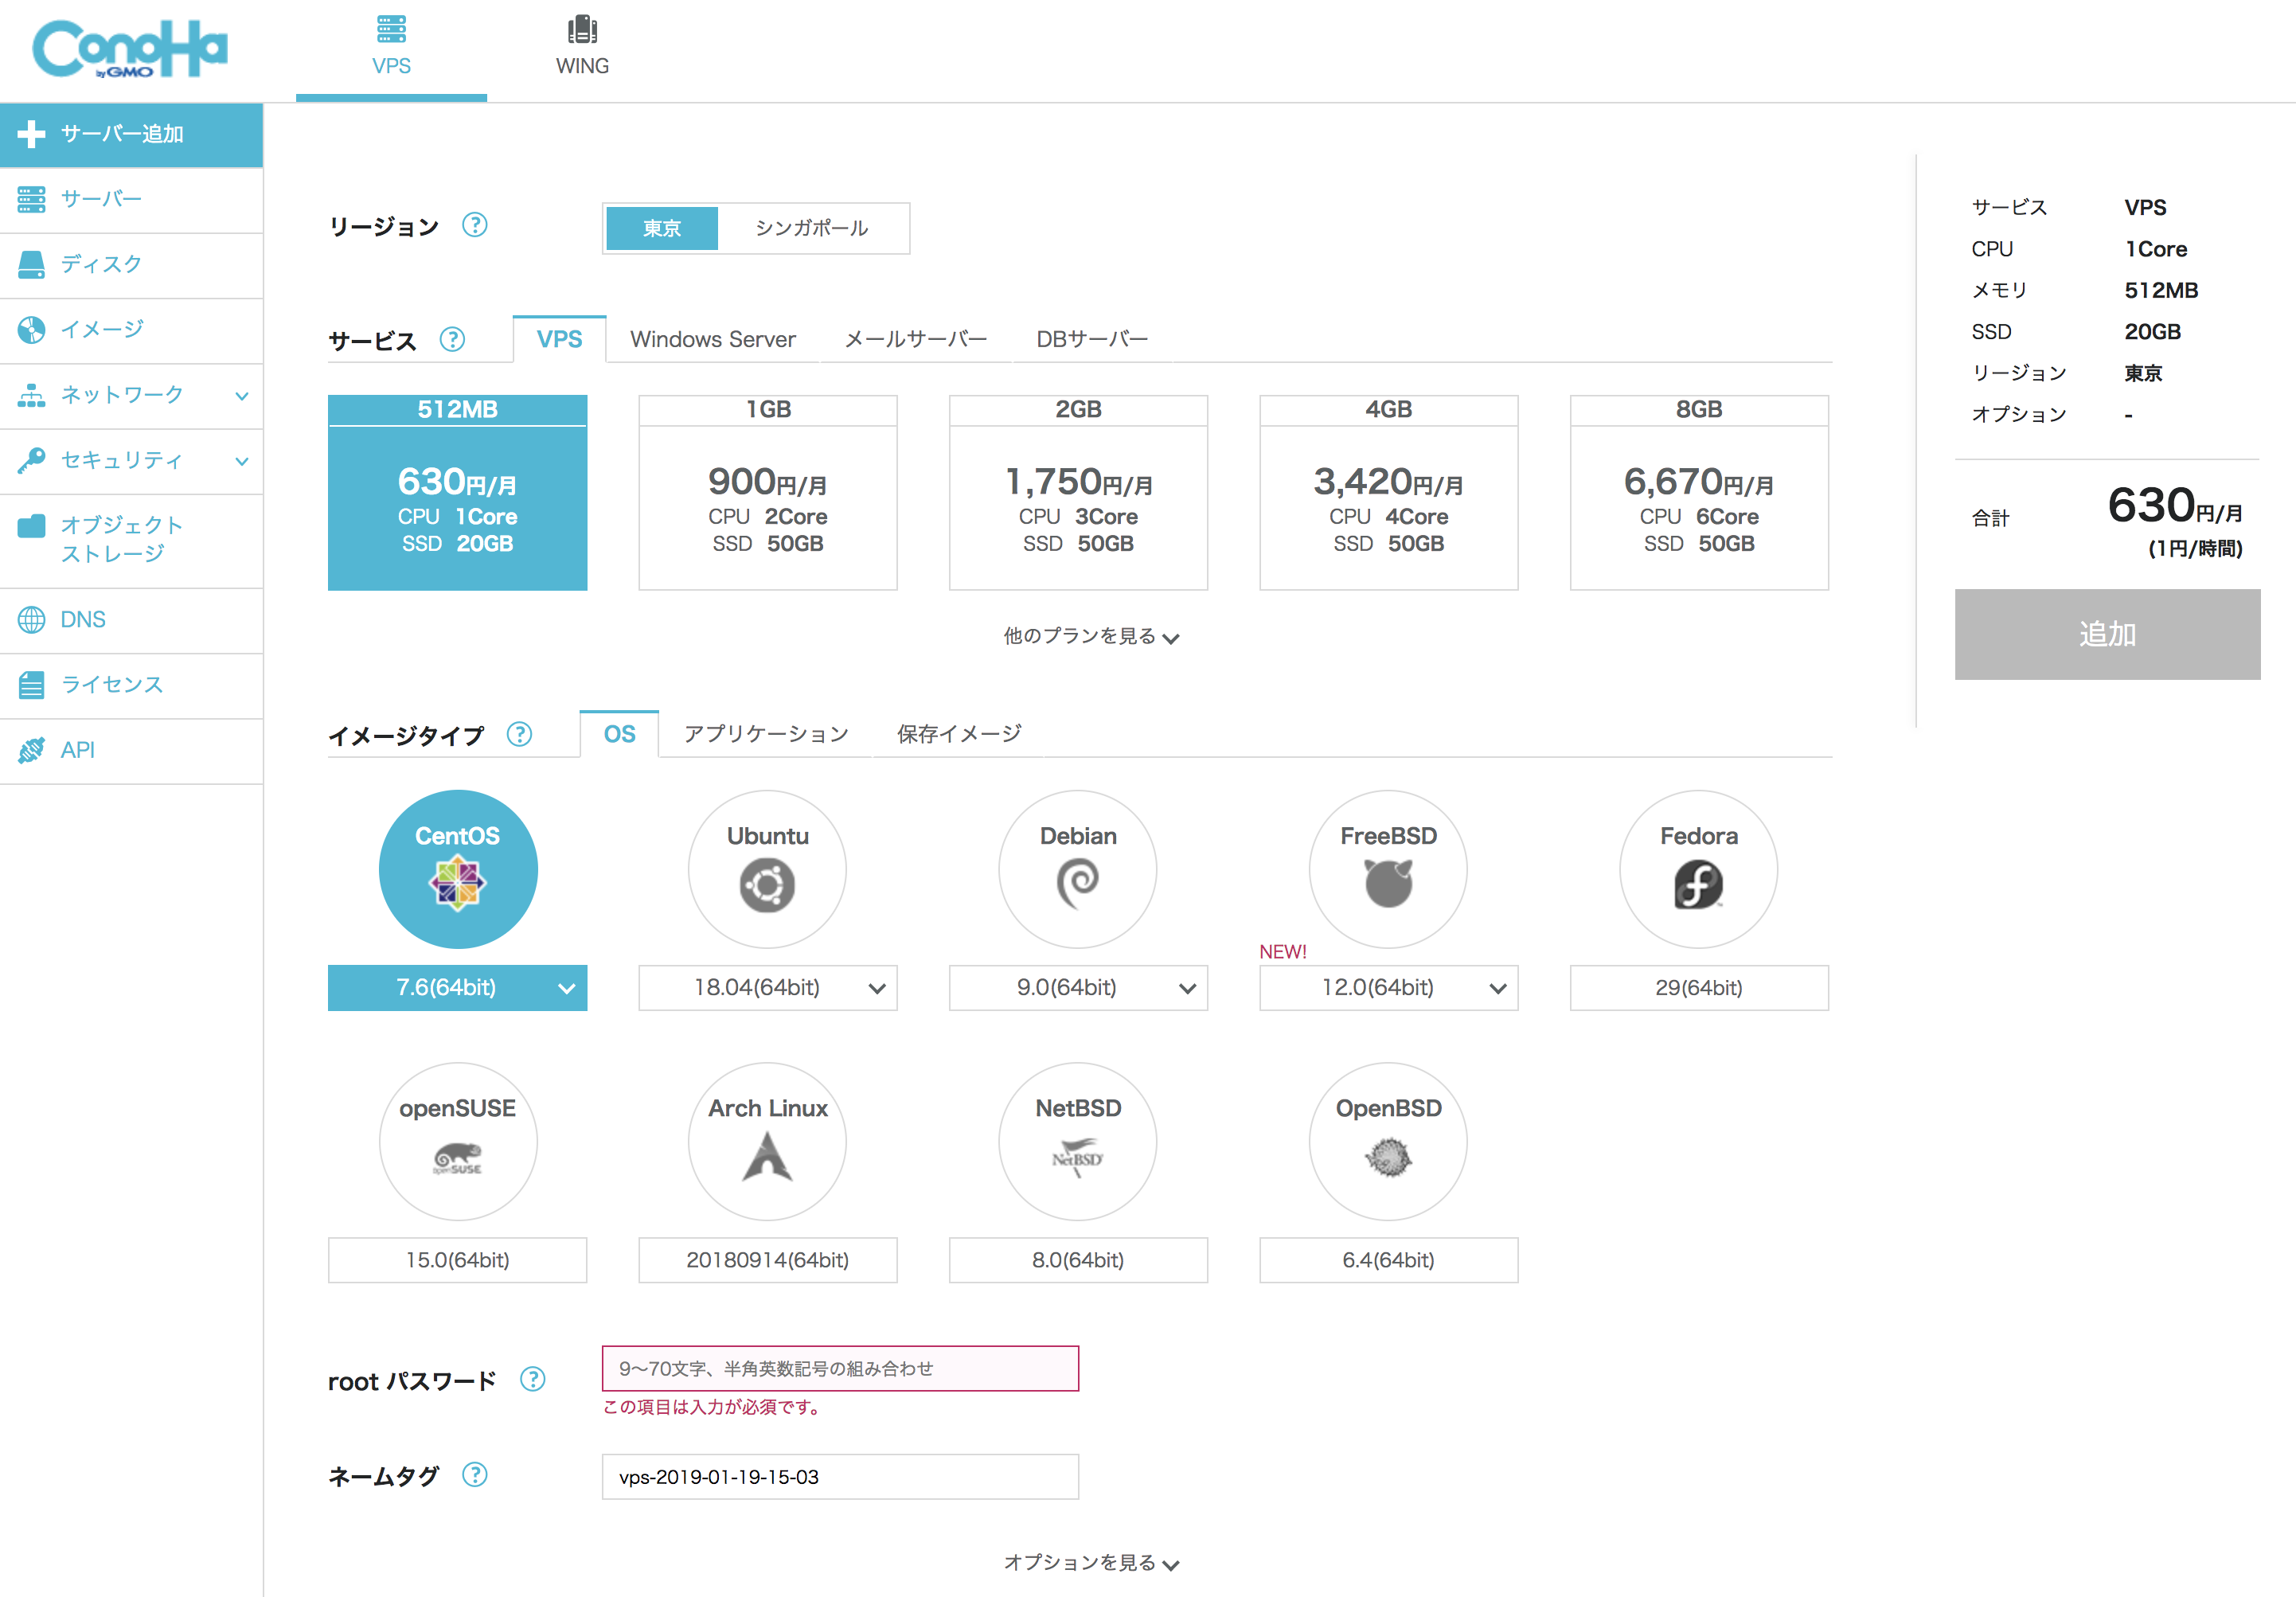
長く放置してた ConoHa の VPS インスタンスをまっさらにして1から作り直したときのメモ。(CentOS 7.6)
たまにしかやらないのでログを残しておく。
インスタンス生成
ここの「オプションを見る」を開いた先の「SSH Key」で「キーを選択」すると、事前に設定済みの公開鍵を選べる。
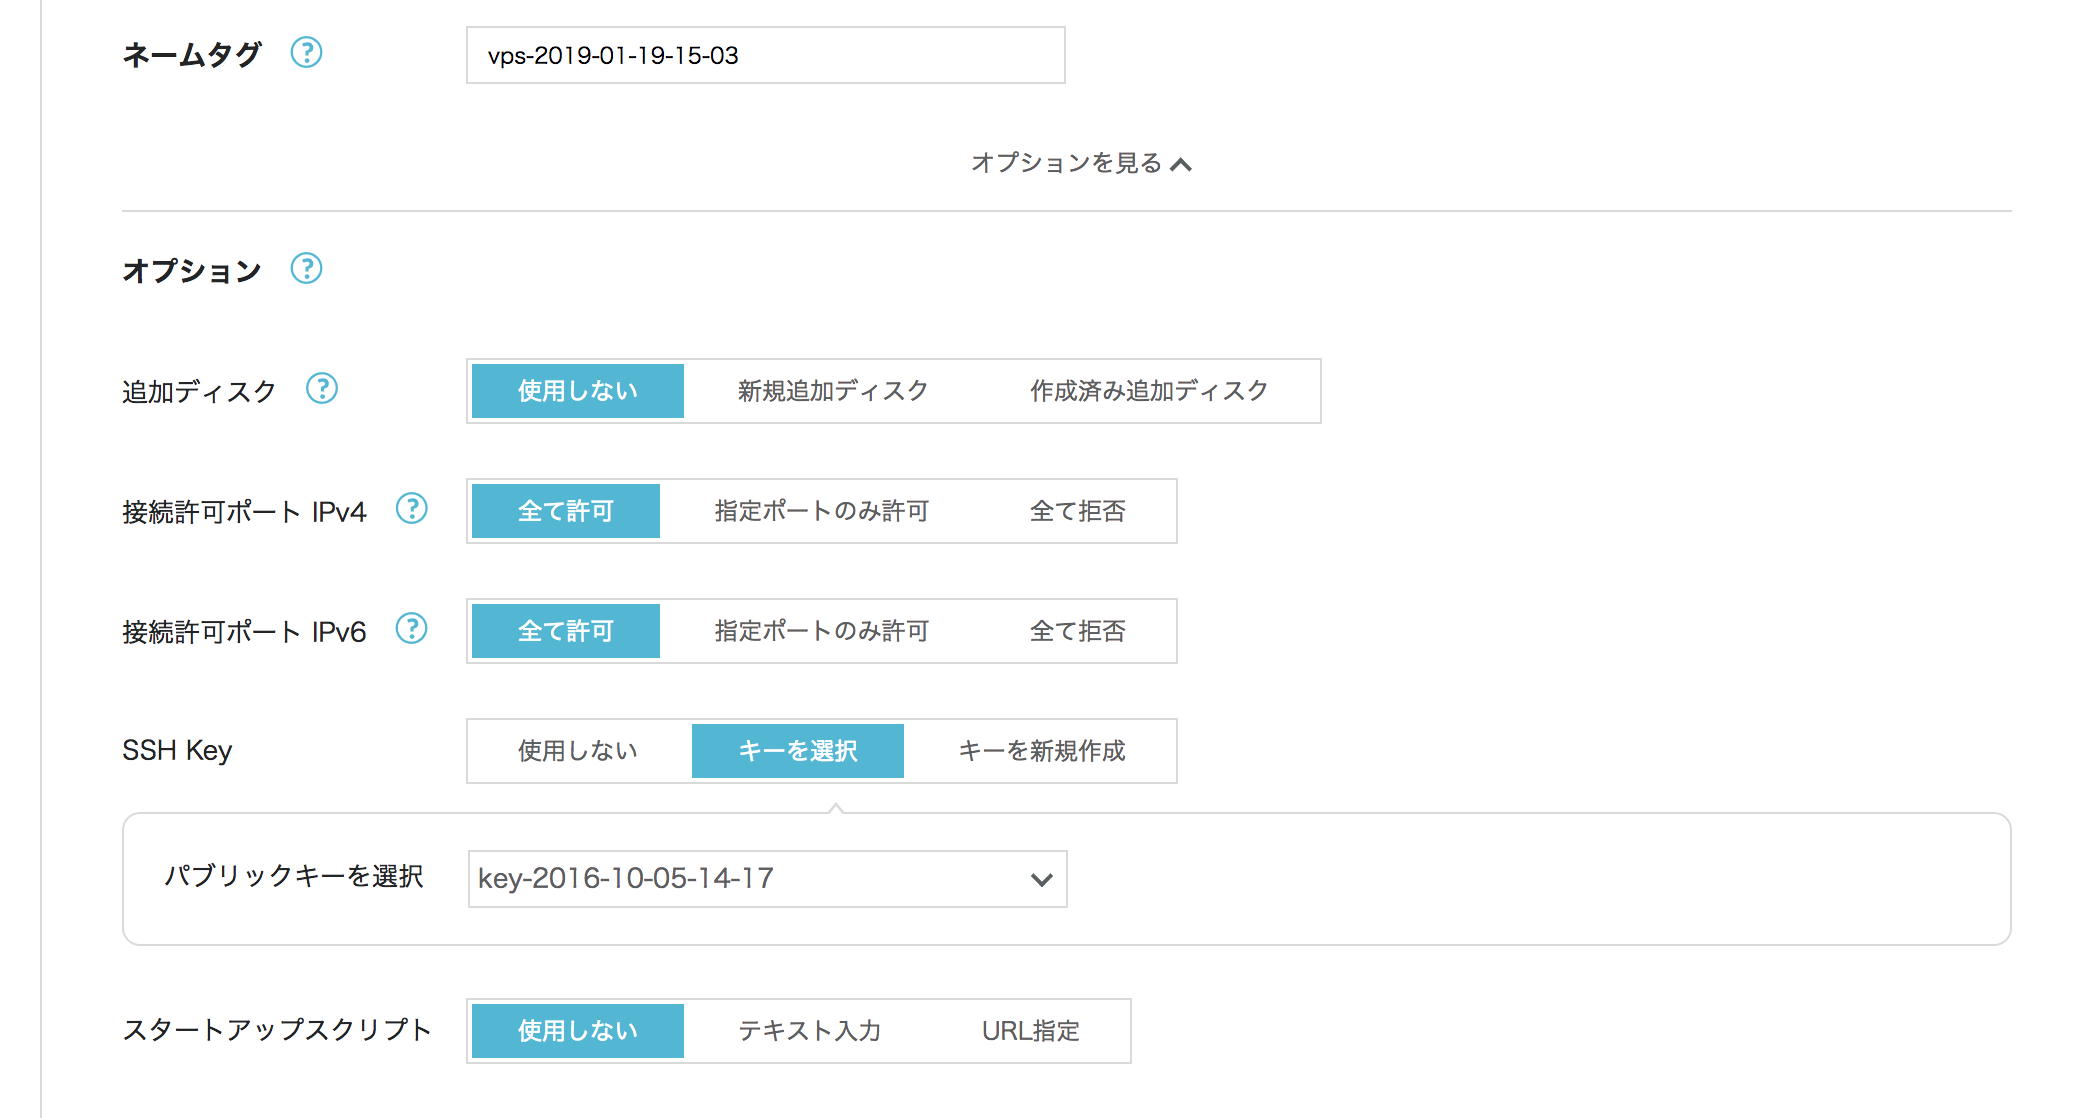
これを選ぶと、 /root/.ssh/authorized_keys が作成されて公開鍵認証のみで接続できるインスタンスが生成される。( PasswordAuthentication no )
通常ユーザ作成
※ 以下の sfus は自分のユーザ名に変えること。
# ssh ログイン
[user@localhost]$ ssh [email protected]

# ユーザー作成
[root@conoha]# adduser sfus

# ユーザのパスワード設定
[root@conoha]# passwd sfus

# wheelグループに追加
[root@conoha]# gpasswd -a sfus wheel

# 作成したユーザでログインできるか確認
[root@conoha]# su sfus
[sfus@conoha]$
作成したユーザで ssh 公開鍵認証できるようにする (root の公開鍵をコピーする)
[root@conoha]# cp -a ~/.ssh /home/sfus/
[root@conoha]# chown -R sfus:sfus /home/sfus/.ssh/
ローカルから接続
[user@localhost]$ ssh [email protected]
[sfus@conoha]$
rootからのログインを禁止 & ポートを変更する
[sfus@conoha]$ sudo vim /etc/ssh/sshd_config
------------------------------------------------------------
# デフォルト 22 となってるのを好みのポート番号に変える
#Port 22
Port 10022

# yes を no に変える
PermitRootLogin no
------------------------------------------------------------

# sshdを再起動する
[sfus@conoha]$ sudo systemctl restart sshd.service
firewalld の設定変更
# 確認
[sfus@conoha]$ sudo firewall-cmd --list-ports --zone=public

# ポート追加
[sfus@conoha]$ sudo firewall-cmd --add-port=10022/tcp --zone=public --permanent

# firewalld 再起動
[sfus@conoha]$ sudo firewall-cmd --reload
success

# 確認
[sfus@conoha]$ sudo firewall-cmd --list-ports --zone=public
10022/tcp
ローカルから接続
[user@localhost]$ ssh [email protected] -p 10022
[sfus@conoha]$
以上